点亮 LED
目录
- Arduino API
- Arduino UNO R3
- STM32F103C8T6 Bule Pill
- ESP32-DevKitC
- MicroPython API
- ESP32-DevKitC
- STM32Cube
Arduino API
Arduino UNO R3
在线仿真:https://www.tinkercad.com/things/aPcPF5JDUOw-led-blinking?sharecode=qxi01Bj7LQ71ykmhJnhSy329A7ZkoUfjXGdz-9Sk2Dw
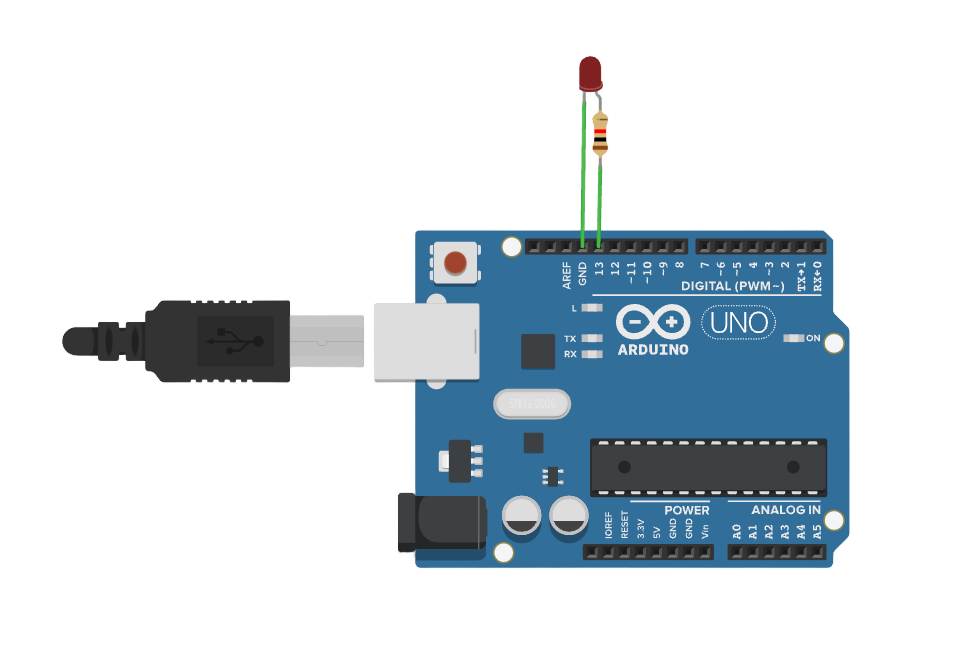
/*
  LED Blinking

  This code demonstrates how to make an LED blink on and off at a 1-second interval using the digitalWrite() and delay() functions.

  The circuit:
  - LED attached from pin 11 to ground

  Diagram:

      Arduino         LED
     ---------       -----
    |         |     |     |
    |     13  |-----|>|---+---- GND
    |         |     (Anode) (Cathode)
    |         |
    |         |

  The LED's anode (longer leg) connects to pin 11, and the cathode (shorter leg) connects to ground (GND).

  created 2024
  by Liang
*/

void setup() {
  // Set pin 11 as an output pin, which will control the LED
  pinMode(13, OUTPUT);
}

void loop() {
  // Turn the LED on by setting pin 11 to HIGH
  digitalWrite(13, HIGH);

  // Wait for 1 second (1000 milliseconds) while the LED is on
  delay(1000);

  // Turn the LED off by setting pin 11 to LOW
  digitalWrite(13, LOW);

  // Wait for 1 second (1000 milliseconds) while the LED is off
  delay(1000);
}
STM32F103C8T6 Bule Pill
在线仿真:https://wokwi.com/projects/411342038321058817
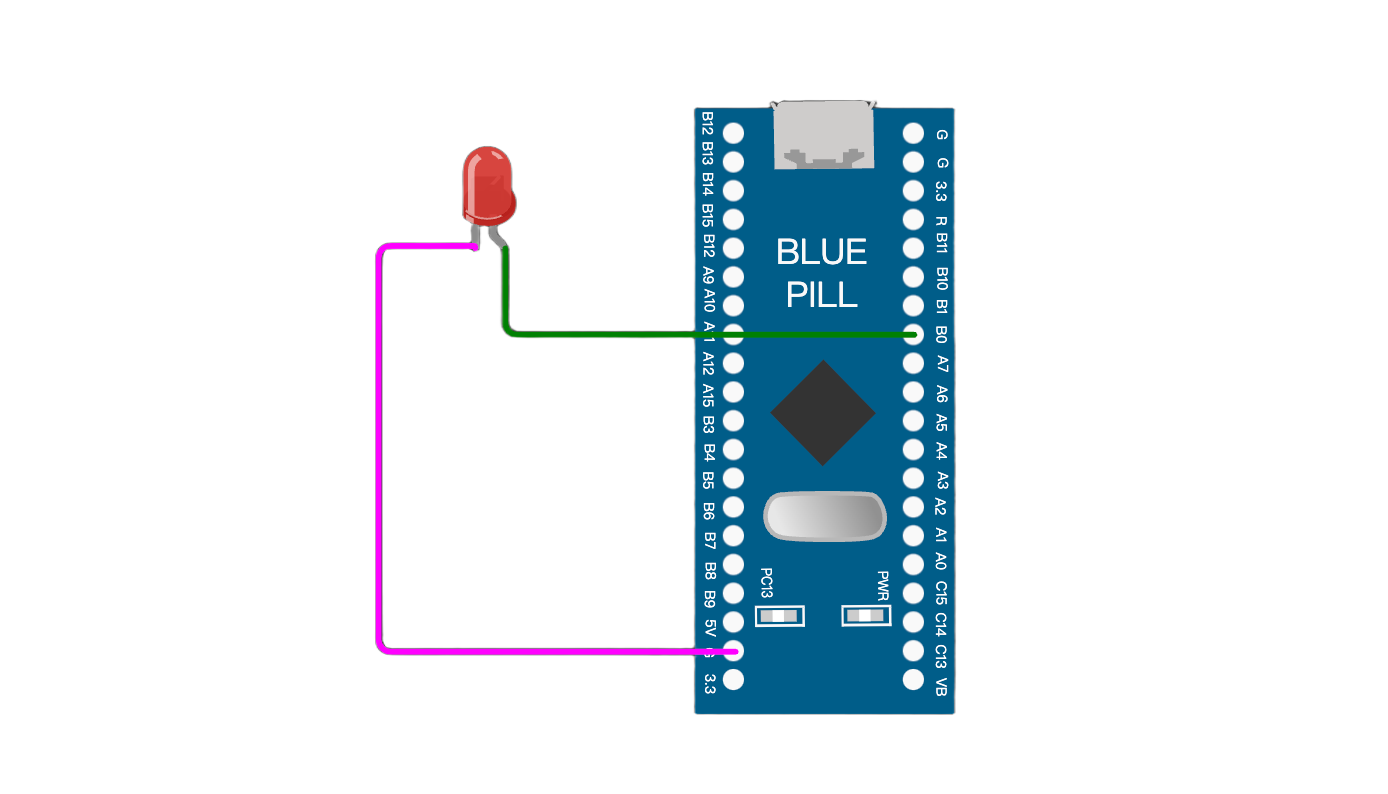
/*
  STM32F103C8T6 (Blue Pill) LED Blinking

  This code demonstrates how to make an LED blink on and off at a 1-second interval using the digitalWrite() and delay() functions.

  The circuit:
  - LED attached from PB0 to ground

  Diagram:

      STM32         LED
     ---------     -----
    |         |   |     |
    |    PB0  |---|>|---+---- GND
    |         |   (Anode) (Cathode)
    |         |
    |         |

  The LED's anode (longer leg) connects to PB0, and the cathode (shorter leg) connects to ground (GND).

  created 2024
  by Liang
*/

void setup() {
  // Set PB0 as an output pin, which will control the LED
  pinMode(PB0, OUTPUT);
}

void loop() {
  // Turn the LED on by setting PB0 to HIGH
  digitalWrite(PB0, HIGH);

  // Wait for 1 second (1000 milliseconds) while the LED is on
  delay(1000);

  // Turn the LED off by setting PB0 to LOW
  digitalWrite(PB0, LOW);

  // Wait for 1 second (1000 milliseconds) while the LED is off
  delay(1000);
}
ESP32-DevKitC
/*
  ESP32 LED Blinking

  This code demonstrates how to make an LED blink on and off at a 1-second interval using the digitalWrite() and delay() functions.

  The circuit:
  - LED attached from GPIO 13 to ground

  Diagram:

      ESP32         LED
     ---------     -----
    |         |   |     |
    |   GPIO13|---|>|---+---- GND
    |         |   (Anode) (Cathode)
    |         |
    |         |

  The LED's anode (longer leg) connects to GPIO 13, and the cathode (shorter leg) connects to ground (GND).

  created 2024
  by Liang
*/

void setup() {
  // Set GPIO 13 as an output pin, which will control the LED
  pinMode(13, OUTPUT);
}

void loop() {
  // Turn the LED on by setting GPIO 13 to HIGH
  digitalWrite(13, HIGH);

  // Wait for 1 second (1000 milliseconds) while the LED is on
  delay(1000);

  // Turn the LED off by setting GPIO 13 to LOW
  digitalWrite(13, LOW);

  // Wait for 1 second (1000 milliseconds) while the LED is off
  delay(1000);
}
MicroPython API
ESP32-DevKitC
在线仿真:https://wokwi.com/projects/411787521156042753
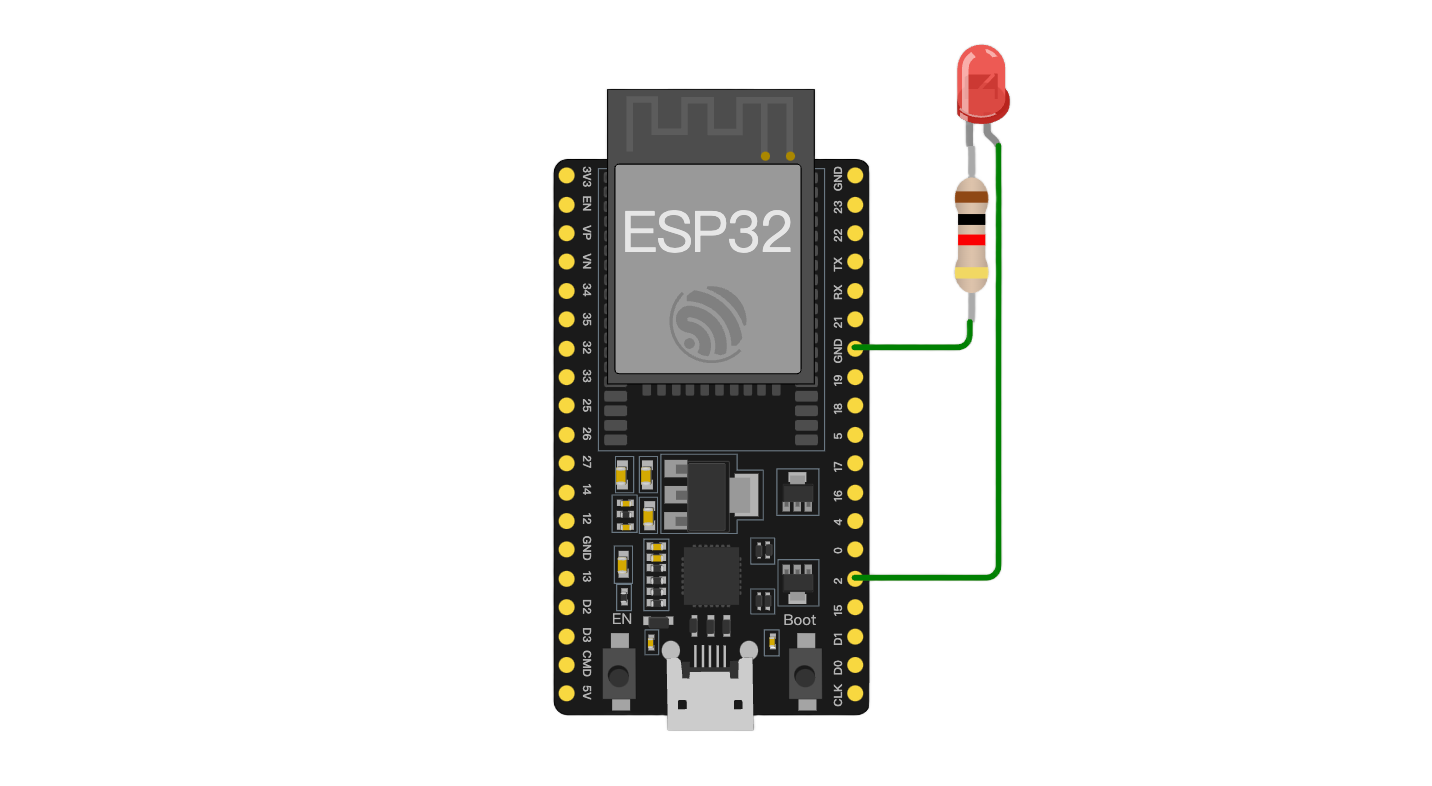
"""
LED Blinking

此代码演示了如何使用 `machine.Pin` 类和 `time.sleep()` 函数使连接到 GPIO2 引脚的 LED 每隔 1 秒闪烁一次。

电路连接:
- LED 连接到 GPIO2 和地线(GND)

电路图:
    ESP32          LED
   ---------      -----
  |         |    |     |
  |    2    |----|>|---+---- GND
  |         |    (Anode) (Cathode)
  |         |
  |         |

LED 的阳极(较长的脚)连接到 GPIO2 引脚,阴极(较短的脚)连接到地线(GND)。

创建于 2024
作者:Liang
"""

from machine import Pin
import time

# 初始化 LED 引脚为输出模式
led = Pin(2, Pin.OUT)

def blink():
    """
    无限循环,使 LED 以 1 秒间隔闪烁。

    在每次循环中,LED 将被点亮 1 秒钟,然后熄灭 1 秒钟。
    """
    while True:
        # 打开 LED
        led.value(1)  # 设置引脚为高电平
        print("LED on")
        # 延时 1 秒
        time.sleep(1)

        # 关闭 LED
        led.value(0)  # 设置引脚为低电平
        print("LED off")
        # 再次延时 1 秒
        time.sleep(1)

# 调用 blink 函数开始执行
blink()
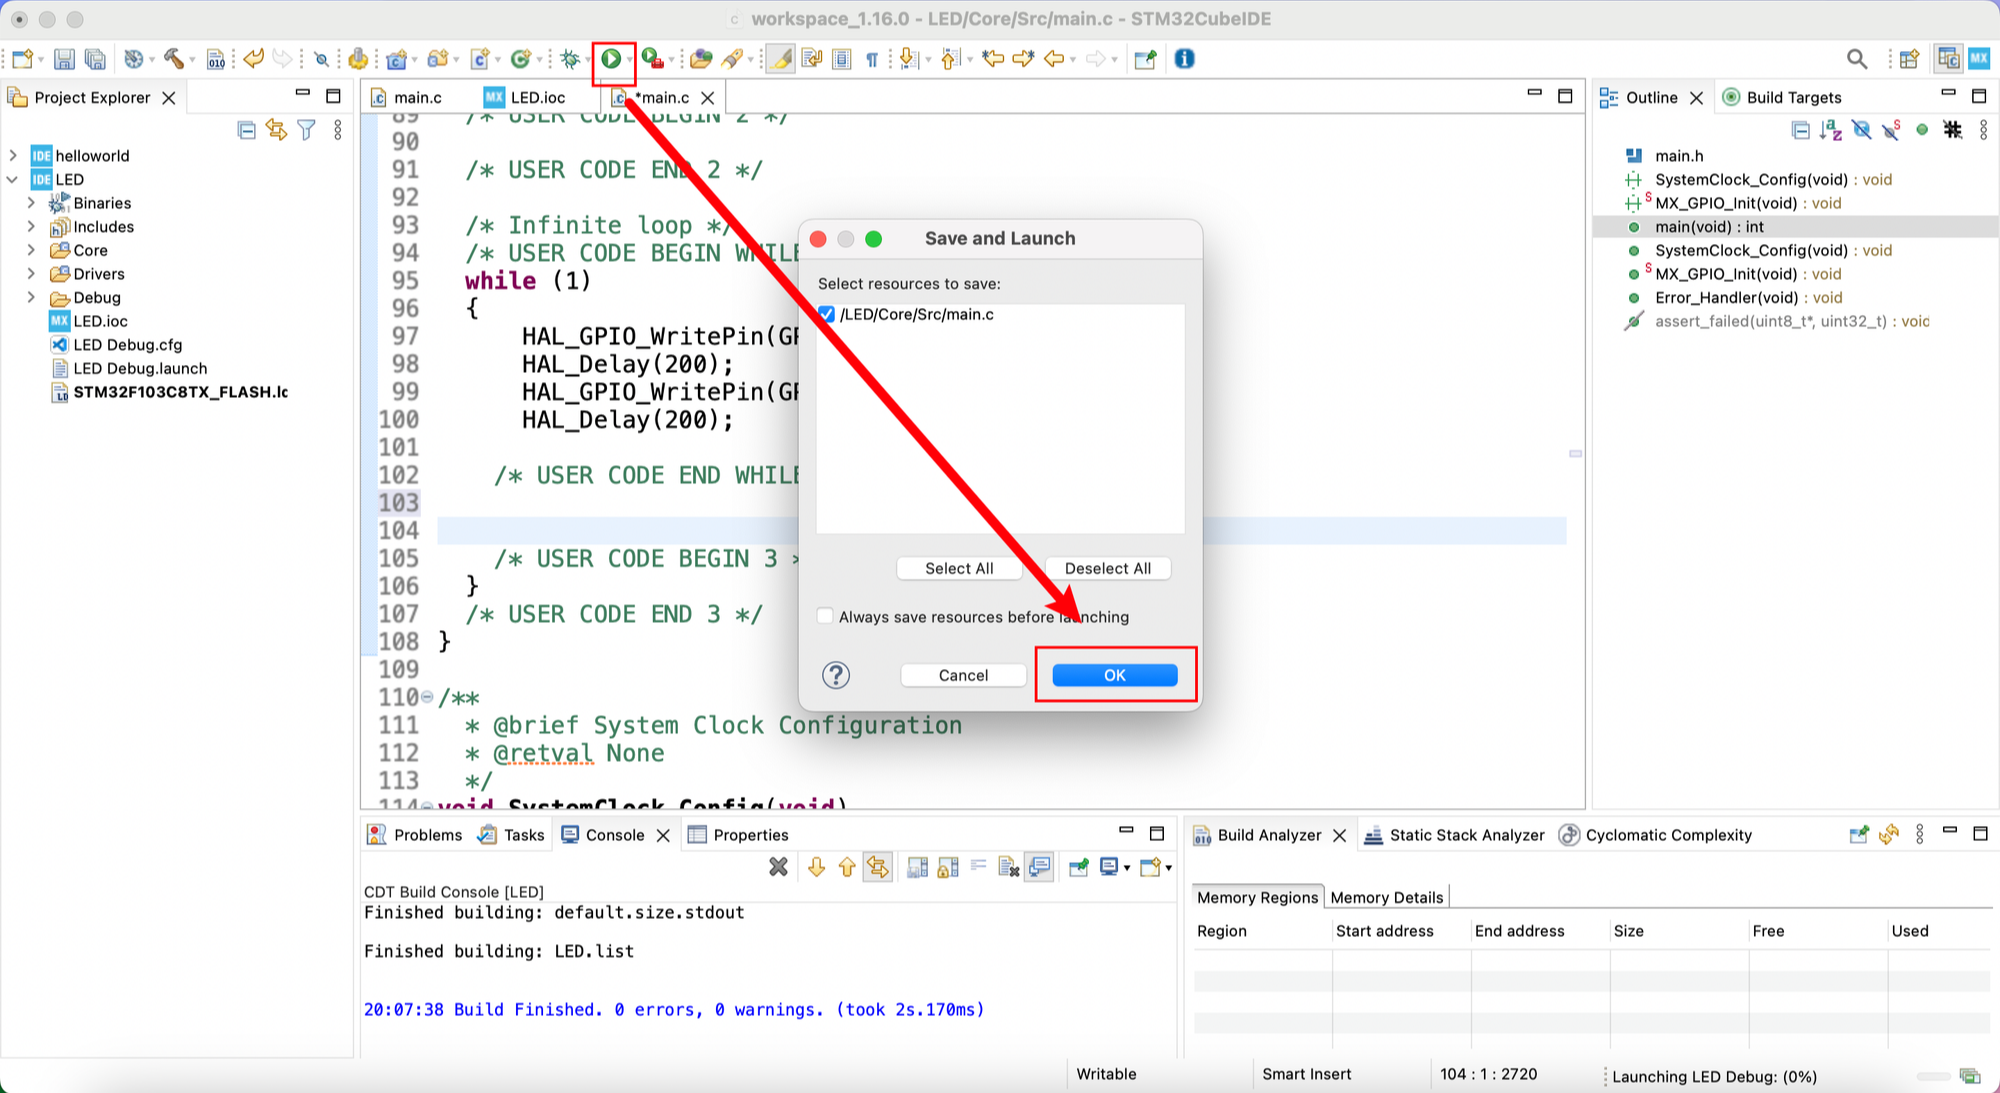
STM32Cube
ST-Link 烧录下载设置
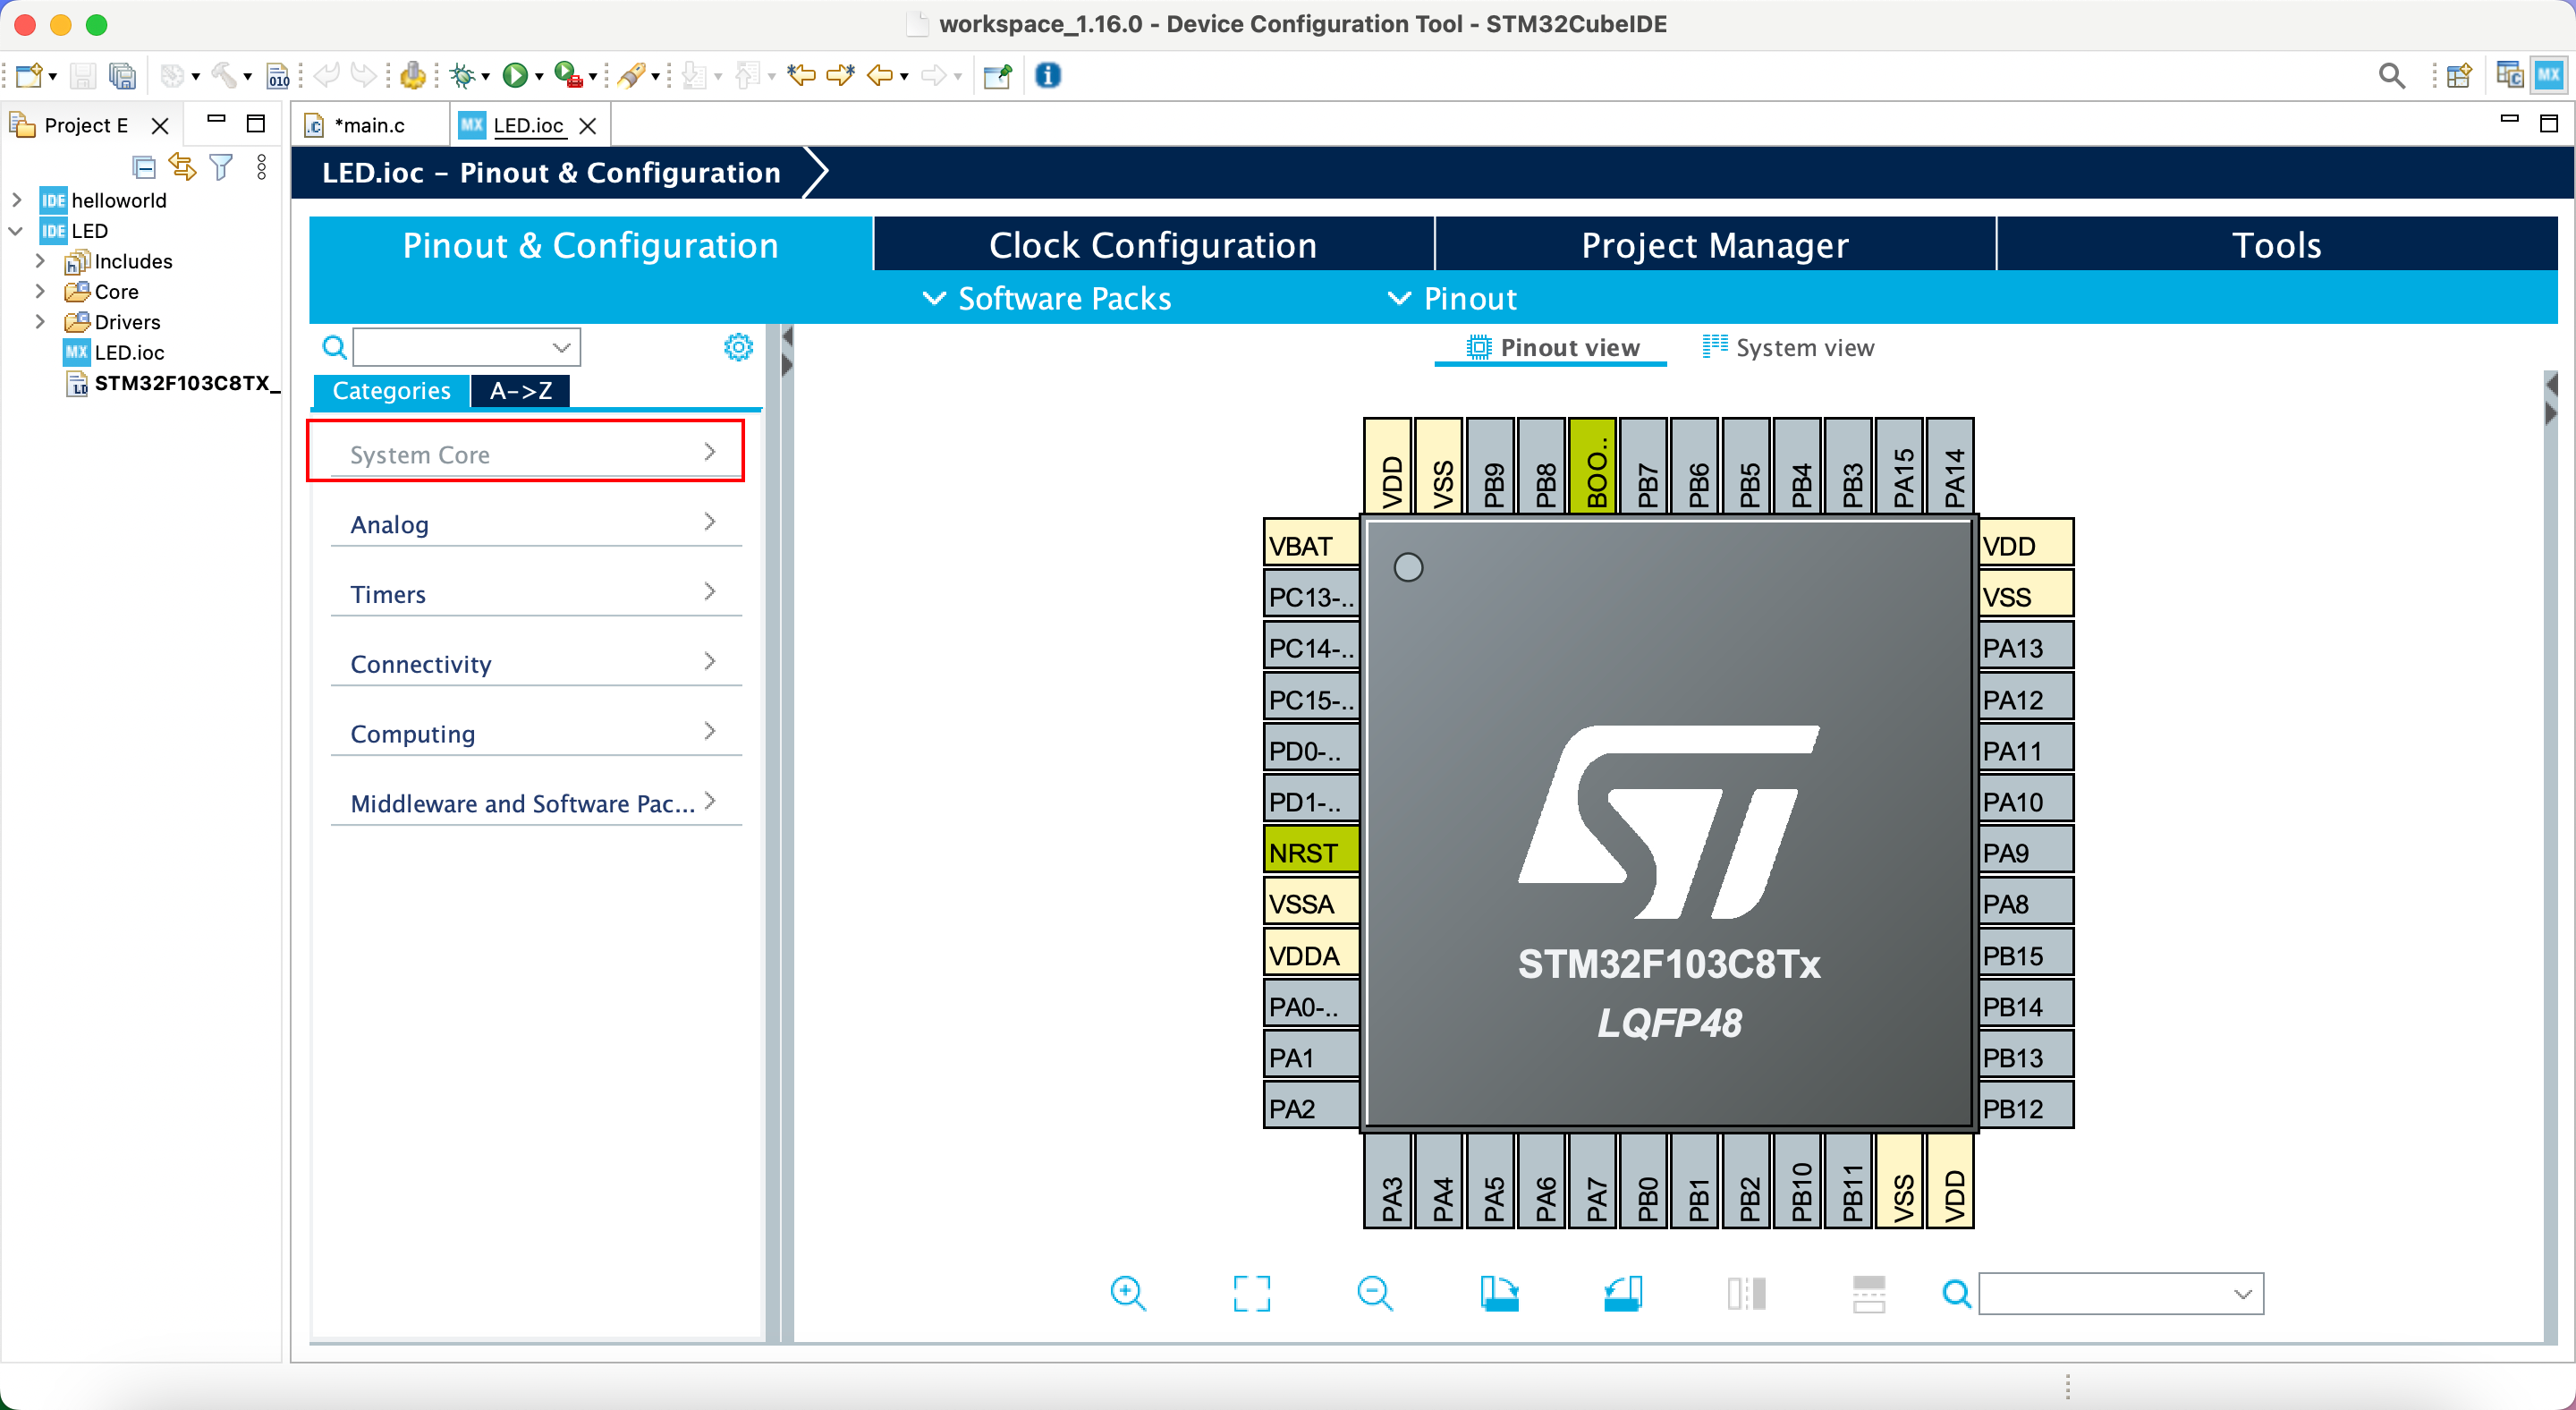
System Core cliked
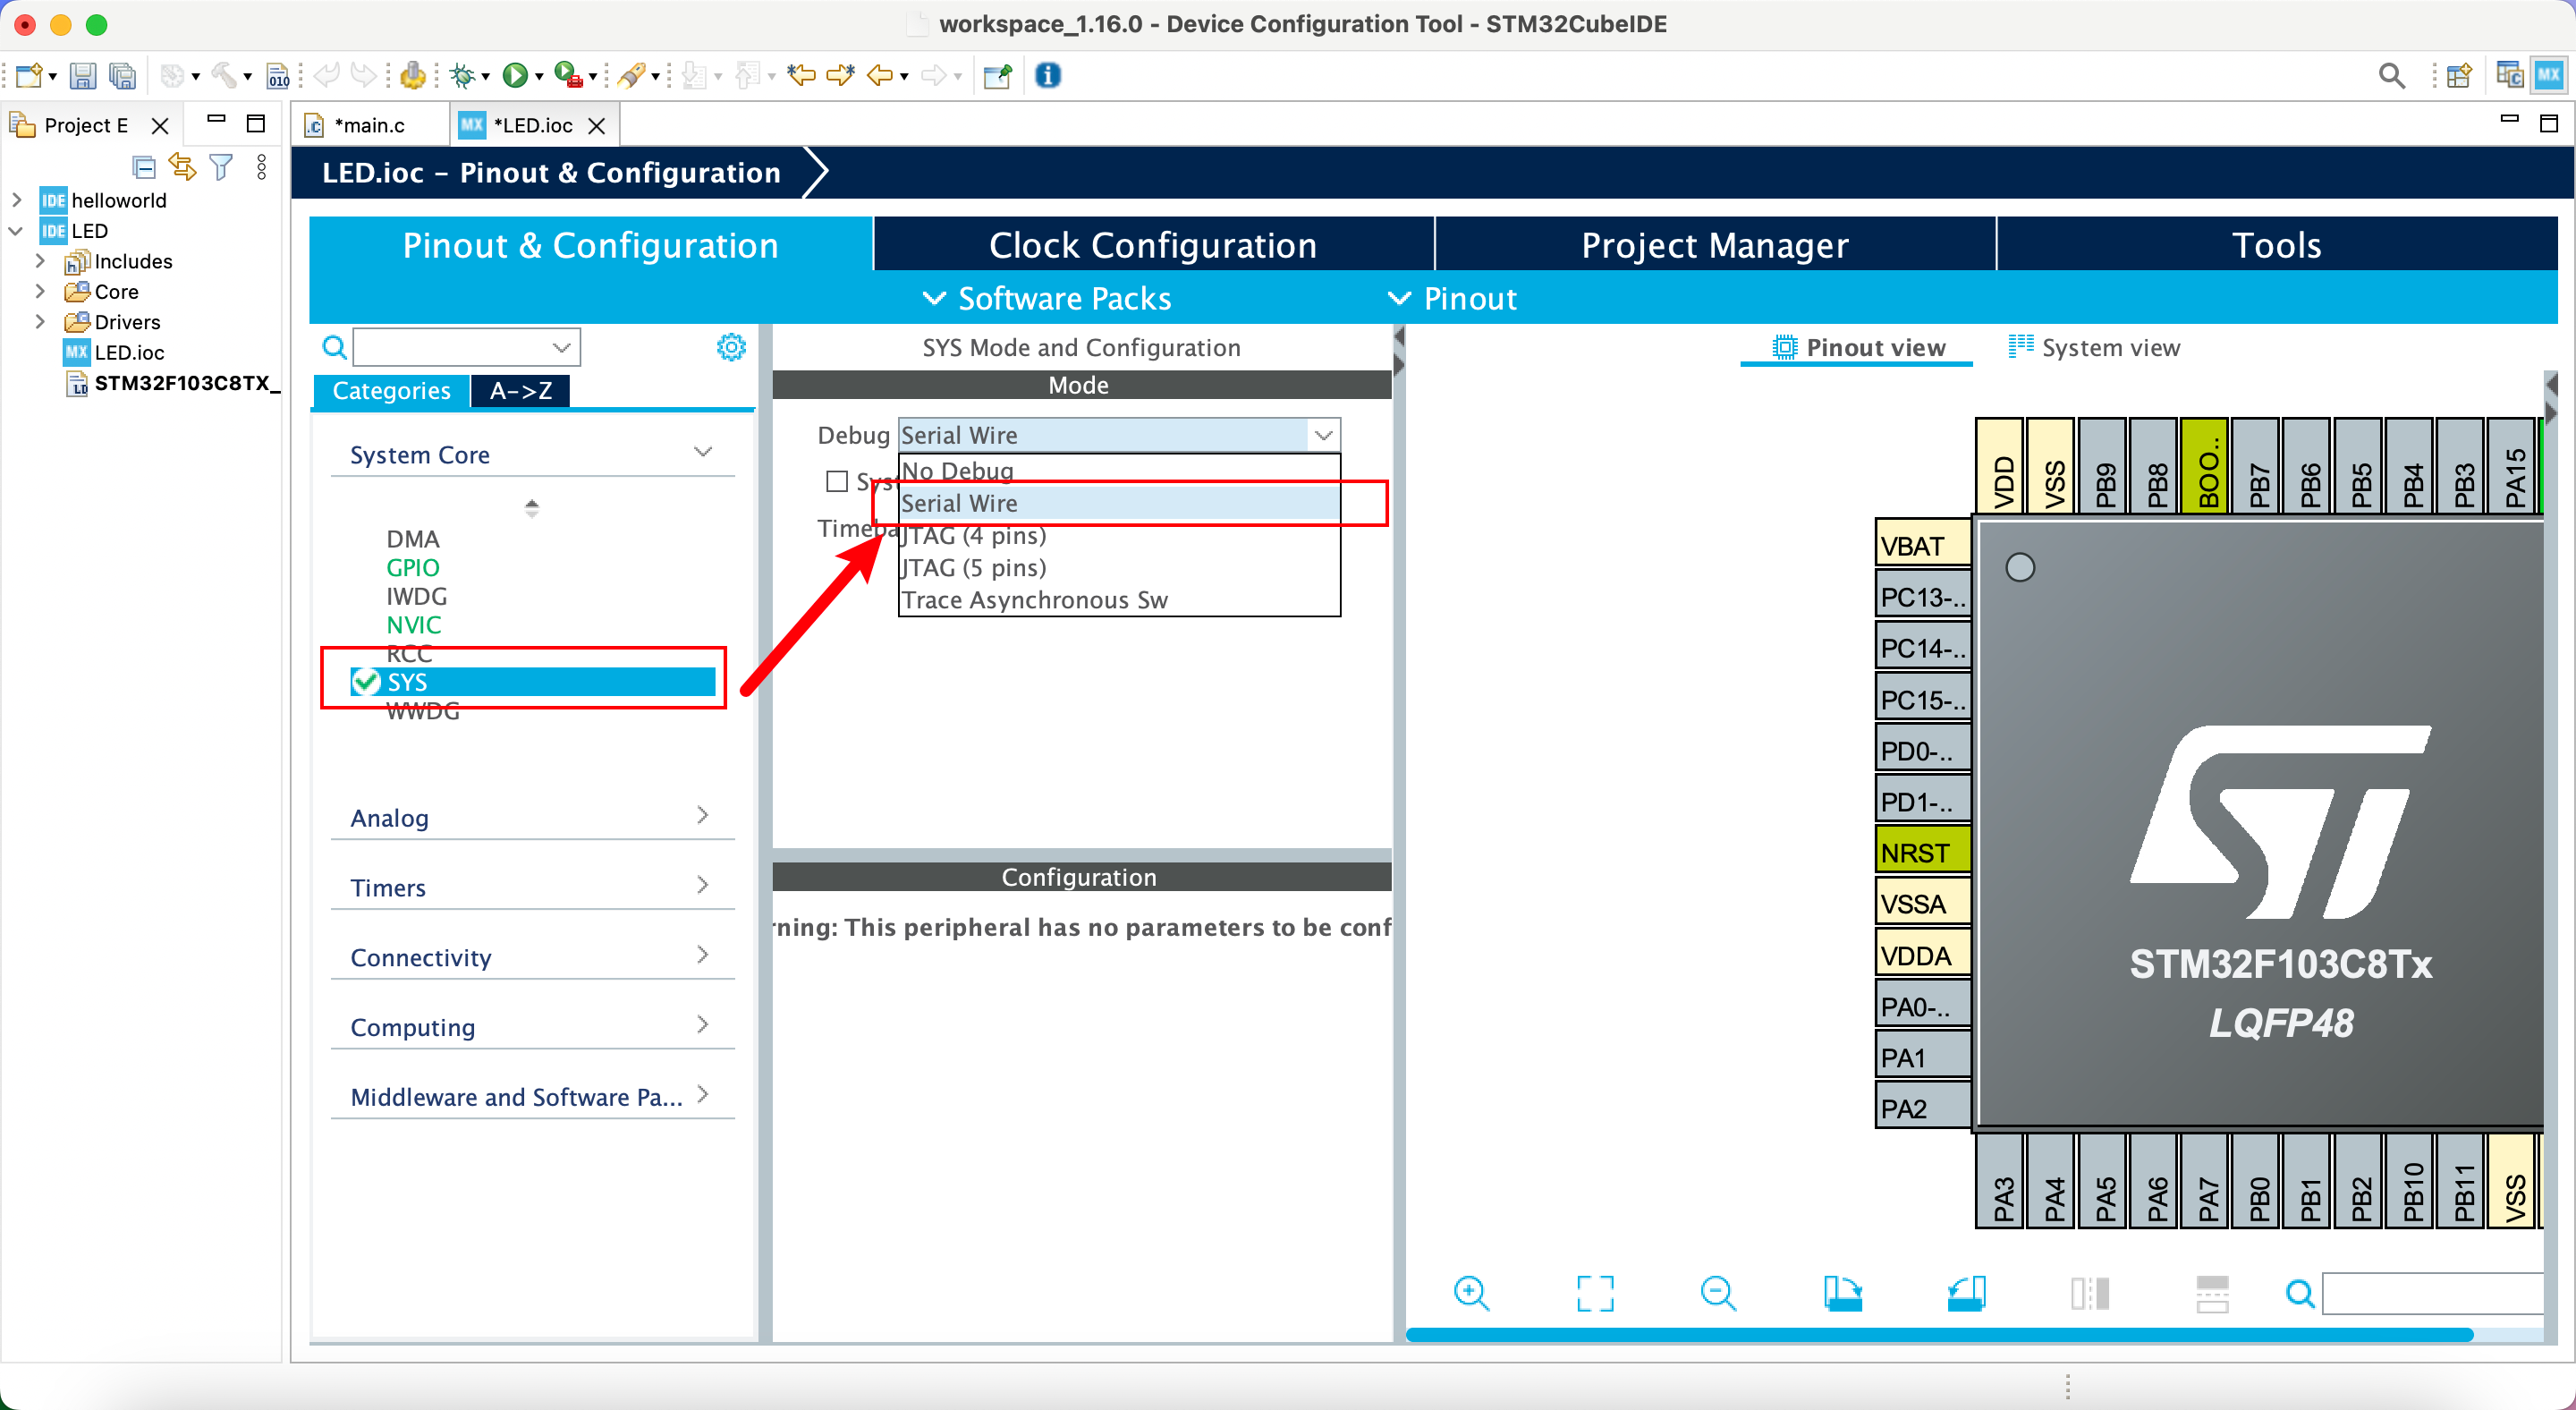
SYS-Debug-Serial Wire
STM32C8T6 核心板,板灯设置,PC13 GPIO
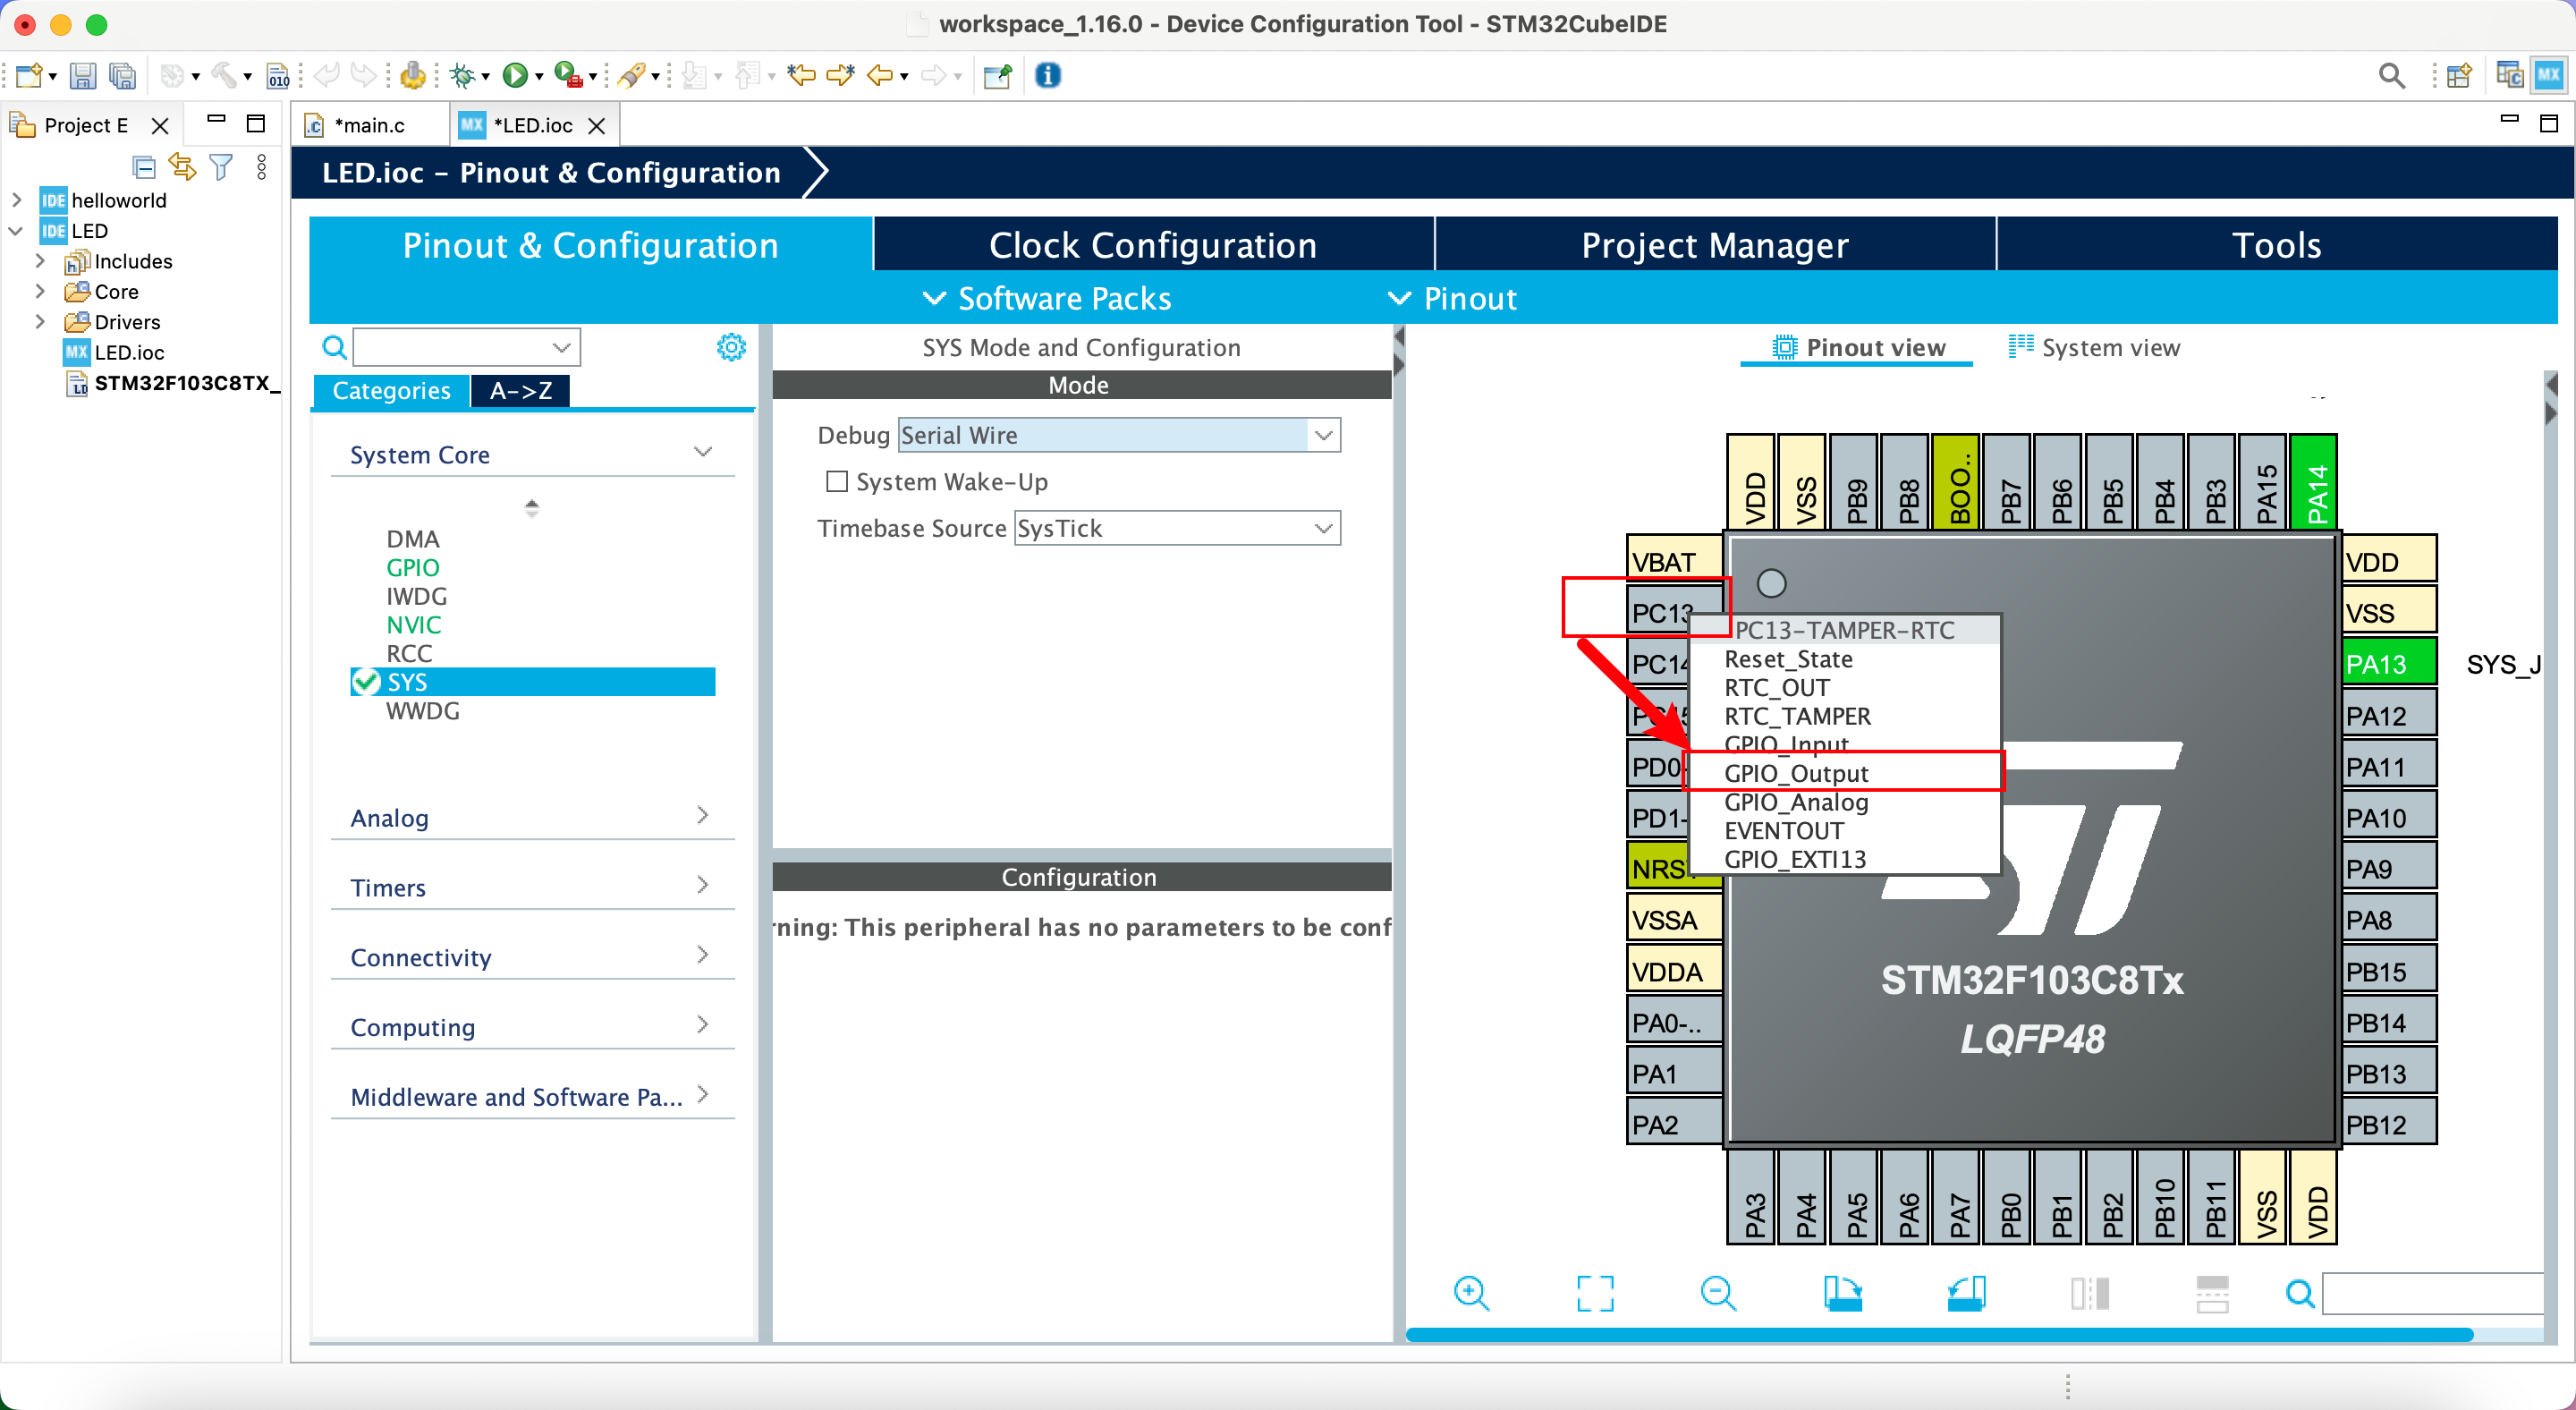
PC13-OUTPUT
生成代码
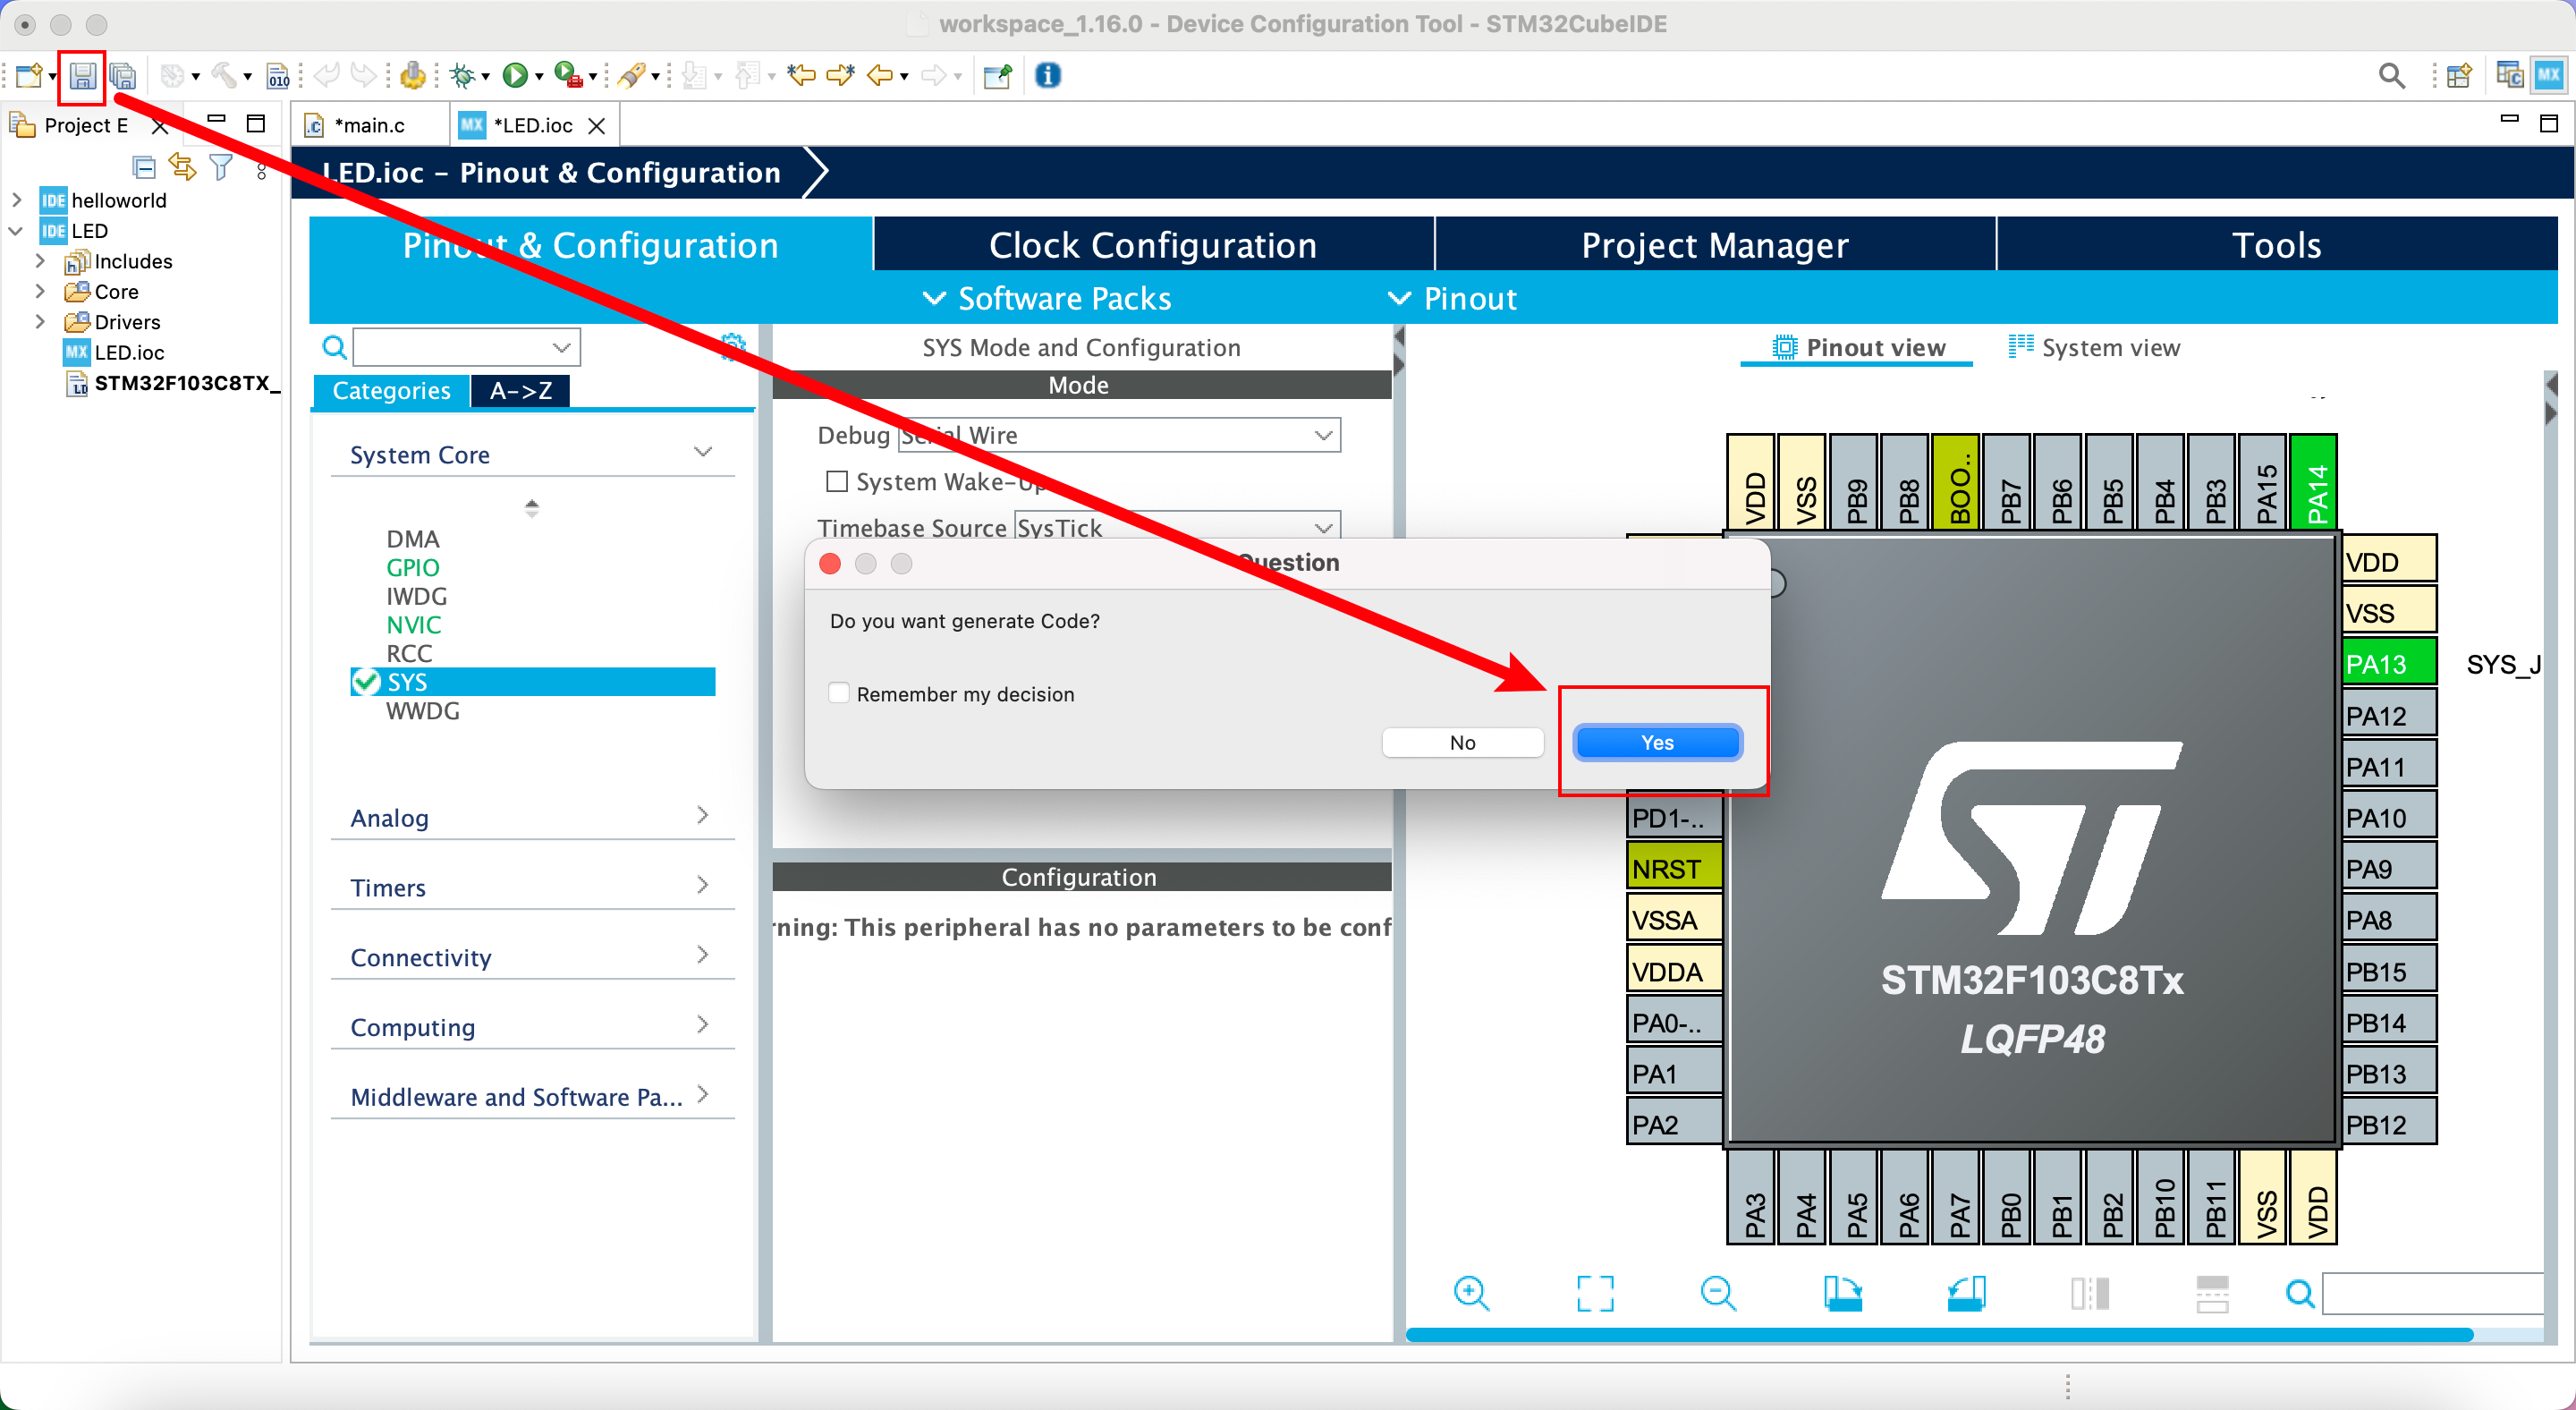
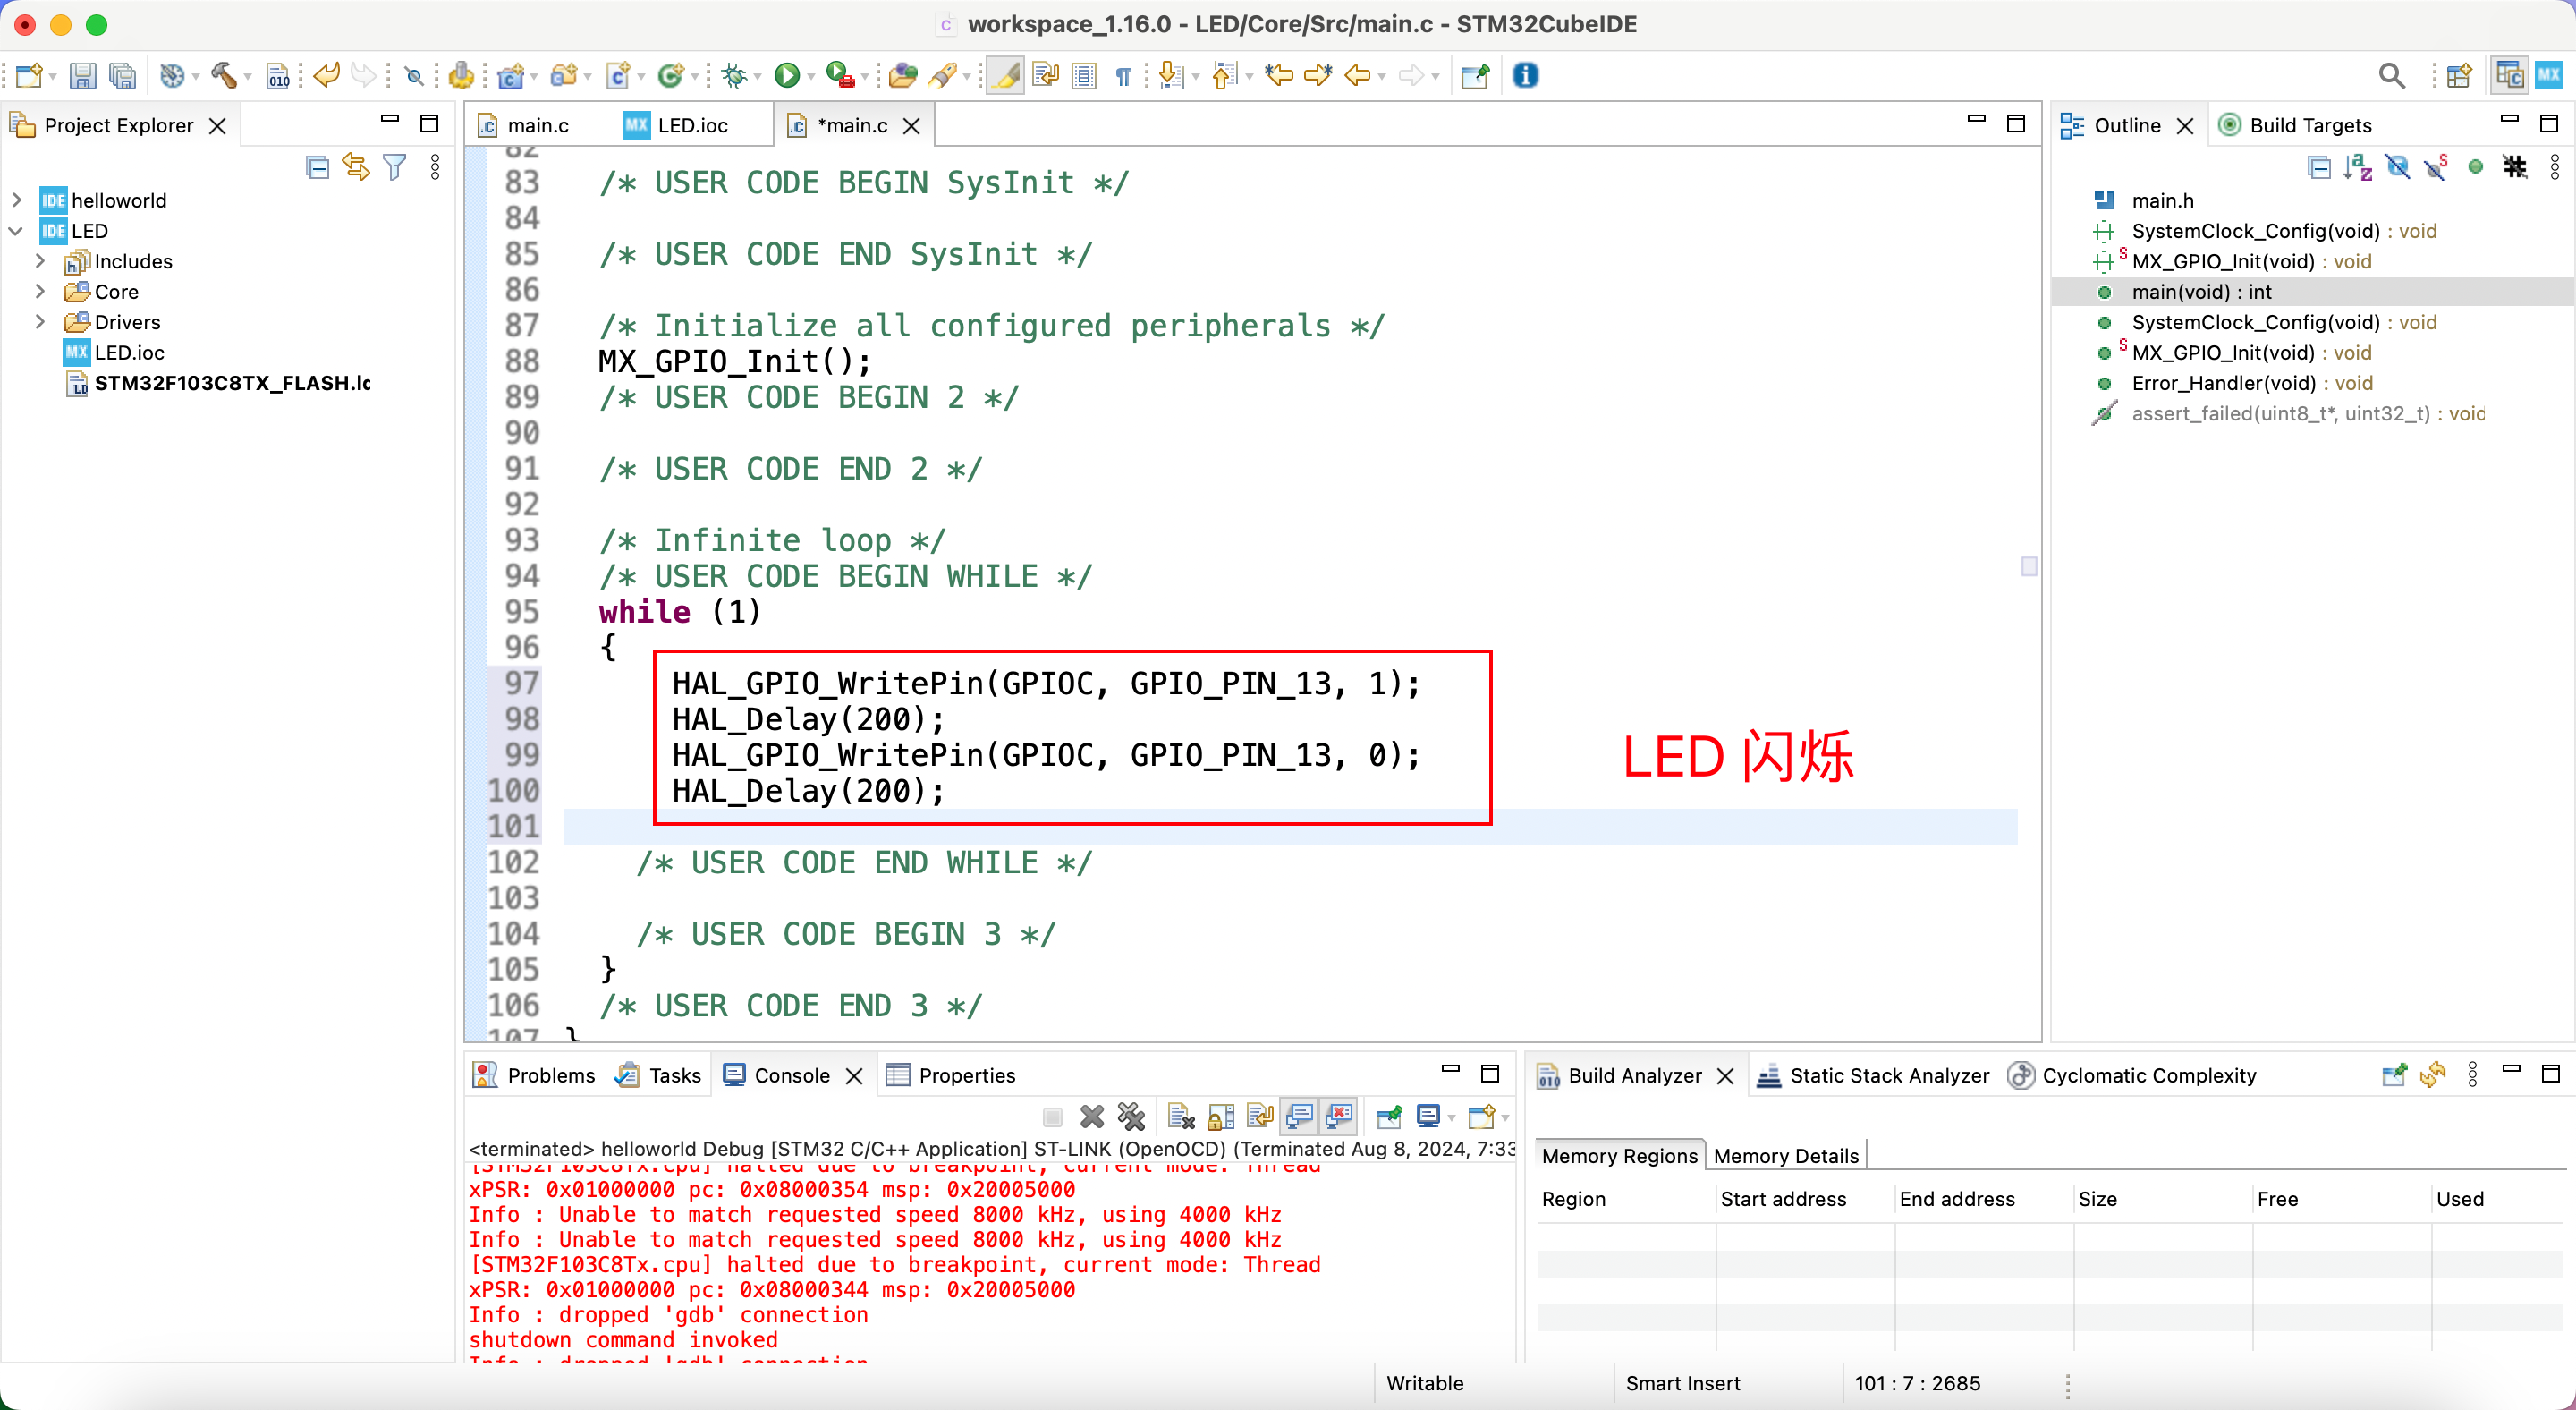
添加闪烁代码
HAL_GPIO_WritePin(GPIOC, GPIO_PIN_13, 1);
HAL_Delay(200);
HAL_GPIO_WritePin(GPIOC, GPIO_PIN_13, 0);
HAL_Delay(200);
编译

烧录下载设置


